Building a Live Order Book Watcher for Kalshi
During the Super Bowl, I was on a flight from SFO to Mexico City. Bad planning, I know. I didn't have a TV to actually watch the game, just airplane wifi and a laptop. I pulled up the Kalshi orderbook for my Kenneth Walker and JSN 2 TD+ prop bets that I placed earlier in the week. They were both NO bets obviously. We've been discussing how longshot bets are overpriced and generally dumb, even though they are the most discussed bets on sports podcasts and are very popular among retail traders.
So it was the middle of the first quarter, and Kenneth Walker had 0 touchdowns. But the NO contract (betting he wouldn't score 2) had a bid at 51¢ and an ask at 94¢. Pre-game, that contract was worth about 76¢.
Believe it or not, it was possible to buy NO at 51¢ and get filled:
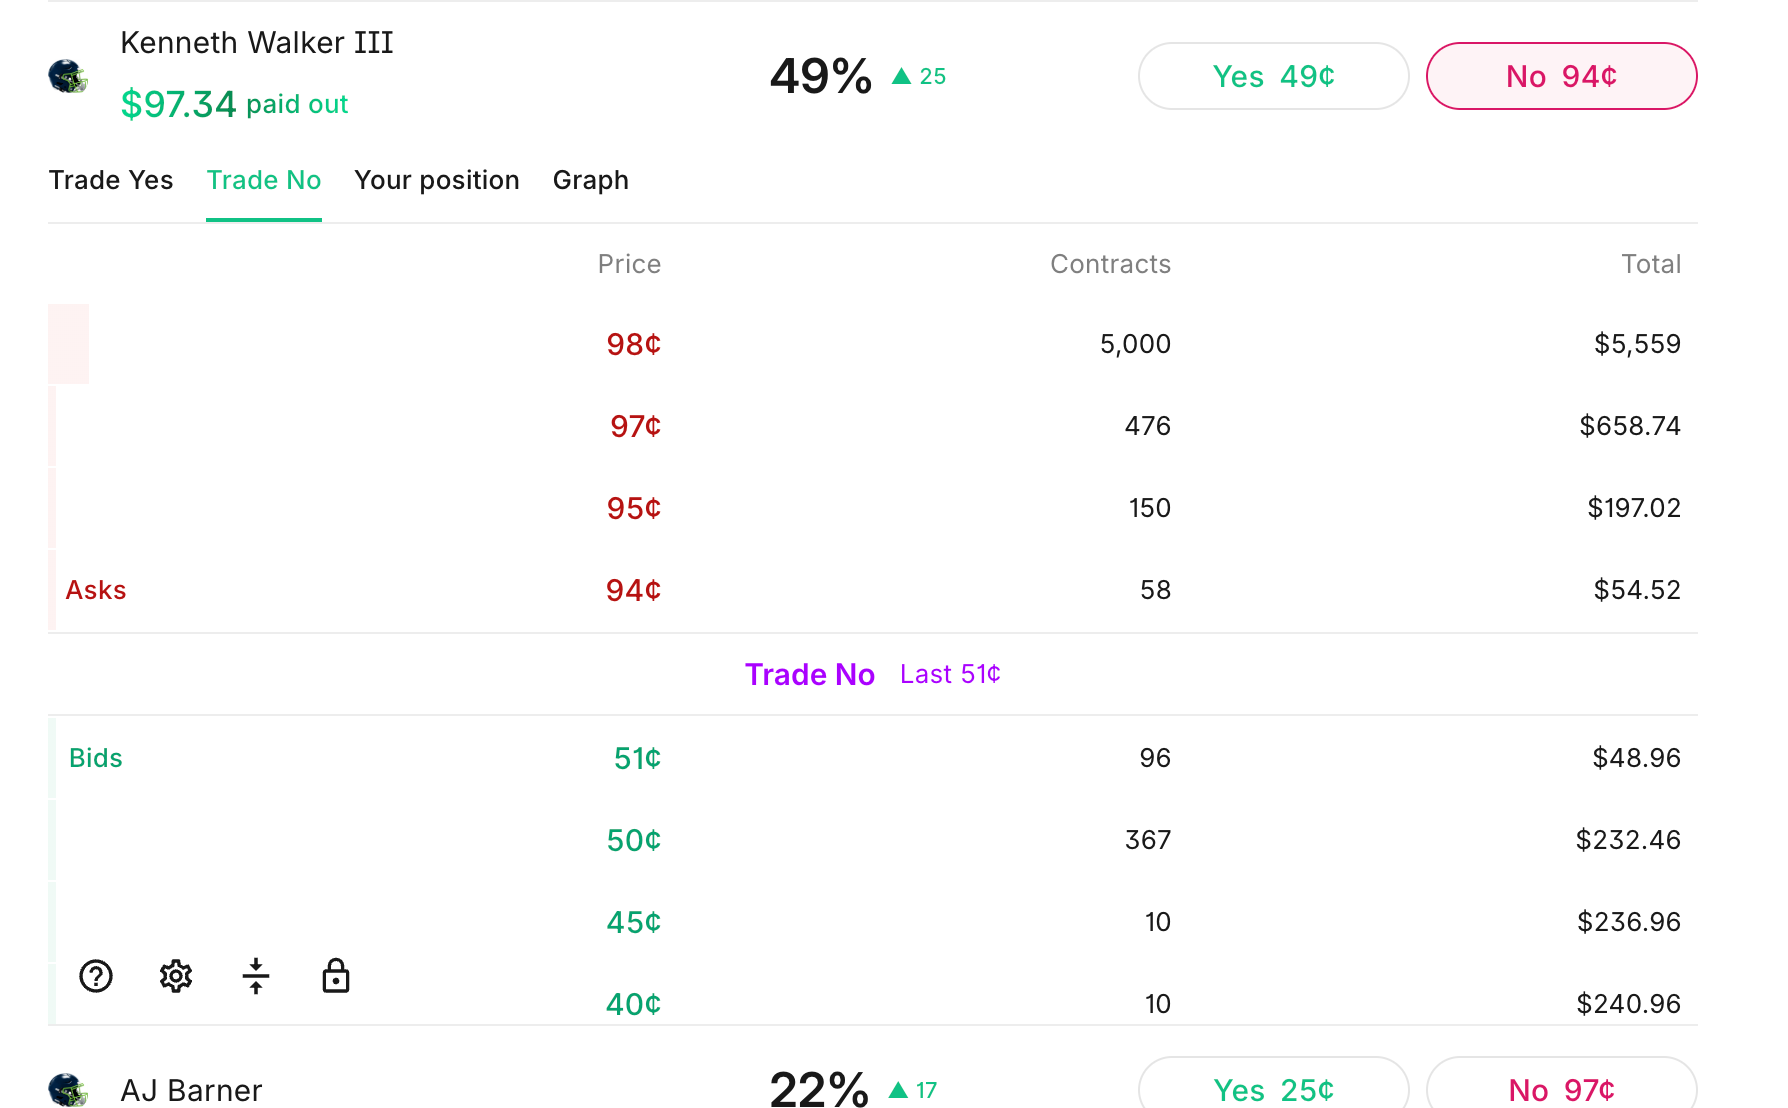
Both sides of the book were wildly mispriced. An order got filled for coin-flip odds that Walker would score 2 TDs. Obviously there were probably greater than 85% odds that he wouldn't score 2 TDs.
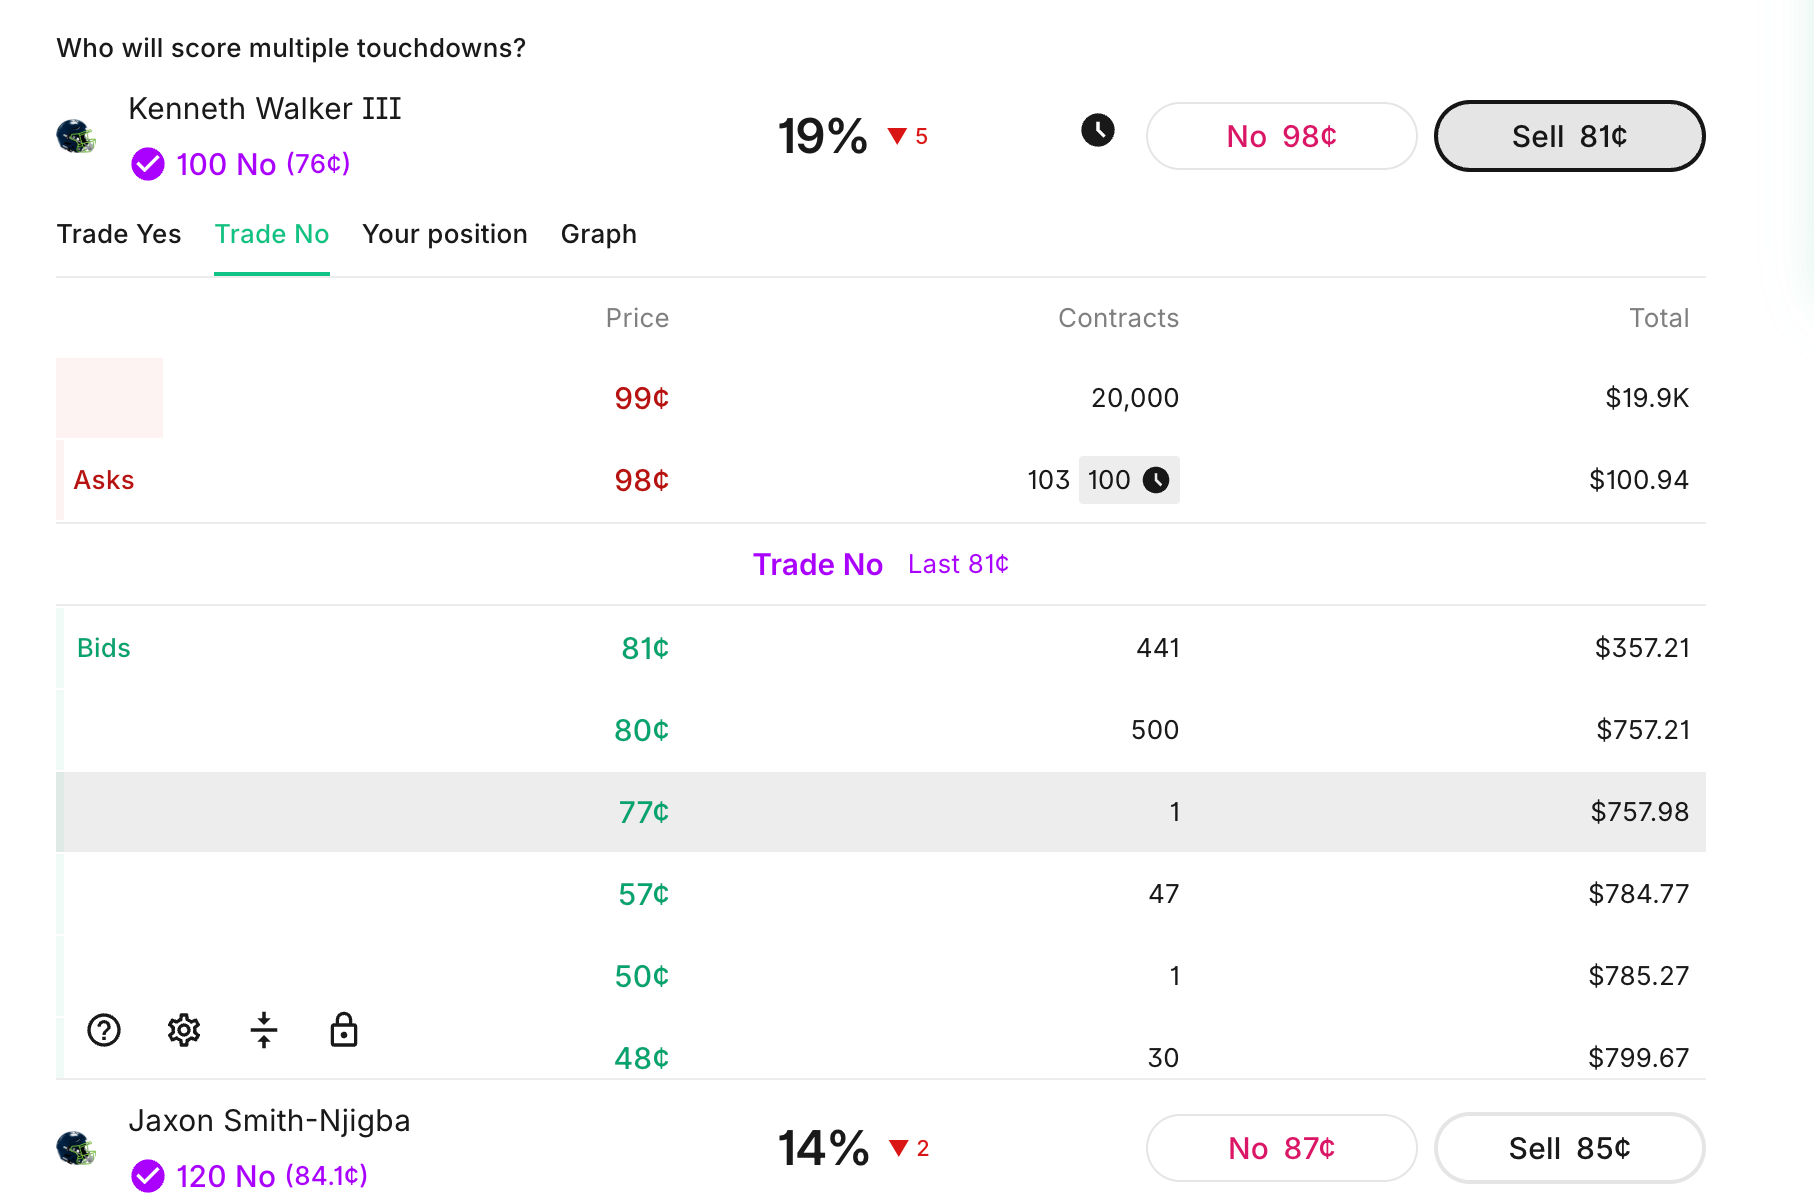
Then as the order book continued updating, I looked at the YES side of the book:

Now over 26,000 contracts were sitting at 1¢ and another 5,000 at 2¢.
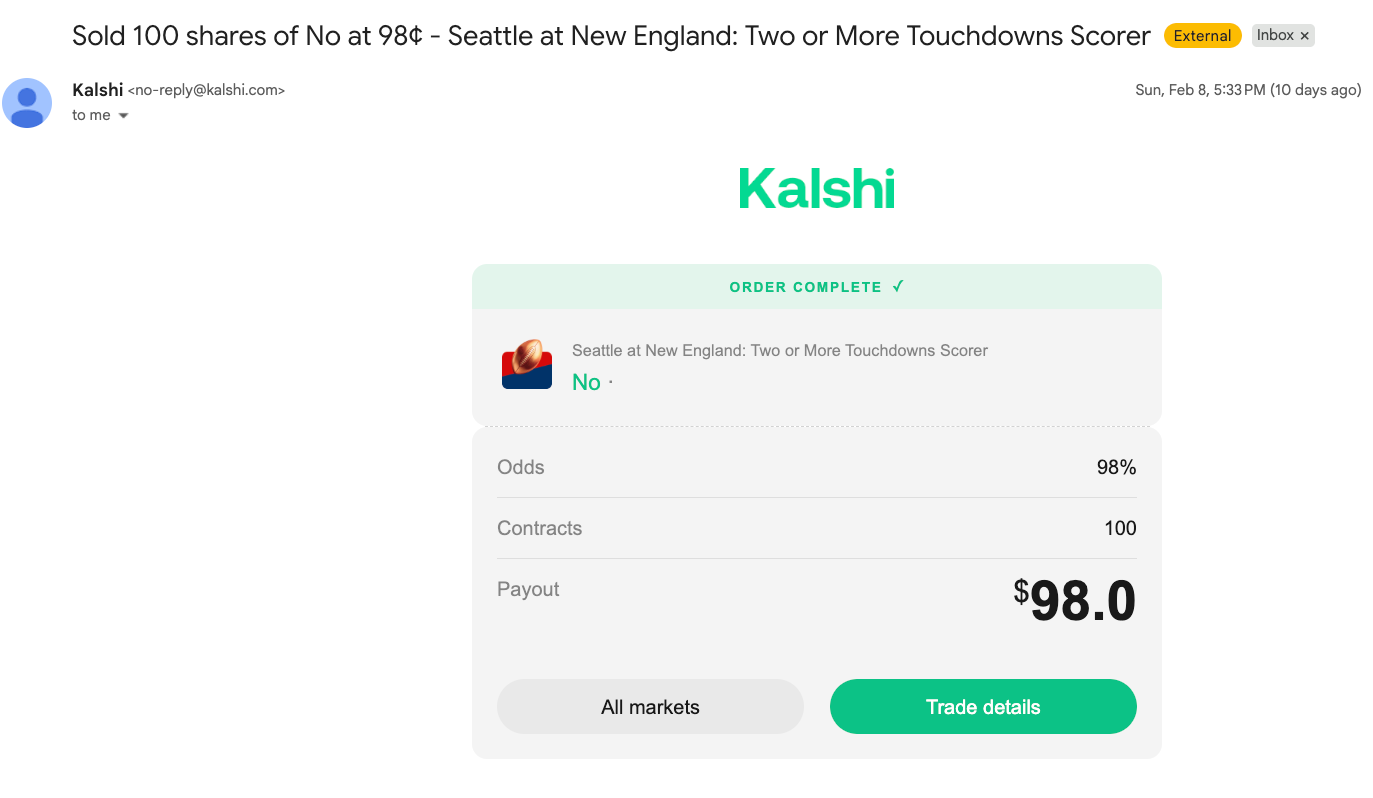
I placed an order to sell my 100 NO's at 98¢, still in the first quarter while on the plane:
My order got filled! I was able to sell my NO contracts at almost full price, as if the outcome were already certain. Yet it was till only the first quarter. I was able to take my risk off the table on both of my NO prop bets, and enjoy the rest of my trip without even waiting for the game to end.
It was also possible at this time to buy both the YES and NO contracts and be profitable, since one side would definitely resolve to 1.00.
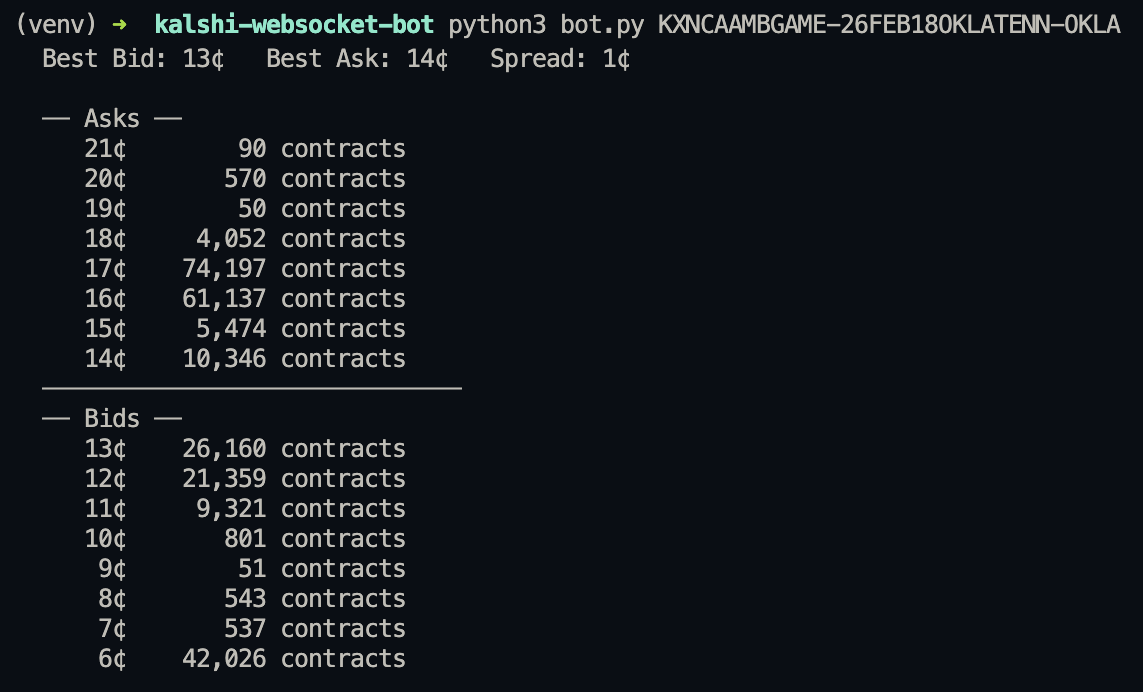
This tutorial builds the tools that makes that possible. We'll connect to the Kalshi websocket API and build a real-time orderbook viewer from scratch, starting with the simplest possible websocket connection and layering on functionality until we have a full orderbook display with live bid/ask/spread tracking. Then in part 2, we'll place actual orders.
Prerequisites
You'll need a Kalshi account with API access. Go to your Kalshi settings and generate an API key. You'll get two things:
- An API key ID (a string like
3f8a9b2c-...) - A private key file (a
.pemfile you download)
Create a .env file in your project directory:
KALSHI_API_KEY_ID=your-api-key-id-here
KALSHI_API_PATH=kalshi.pem
Install the dependencies:
pip install websockets cryptography python-dotenv requests
Step 1: The Simplest Websocket
Let's start with the bare minimum. Connect to the Kalshi websocket and print whatever comes back. Save this code to a file named watcher.py:
import asyncio
import json
import websockets

WS_URL = "wss://api.elections.kalshi.com/trade-api/ws/v2"

async def main():
    async with websockets.connect(WS_URL) as ws:
        print("Connected!")
        while True:
            msg = await ws.recv()
            print(msg)

asyncio.run(main())
If you run this, you'll get a connection error. Kalshi requires authentication on the websocket handshake itself. You can't even connect without signed headers.
But this shows the basic structure: websockets.connect() opens a persistent connection, and ws.recv() awaits the next message from the server. The async with block keeps the connection alive.